
How to Submit an Activity
for the Club Calendar
Do you have an activity that you would like to have us put on our calendar?
You are willing to be the host/hostess
You will work with a member of the Board or a Committee to complete the activity
Please follow the steps below to submit your activity
Hint: It’s best if you use a desktop or laptop for these instructions
Step One
Sign in to your account
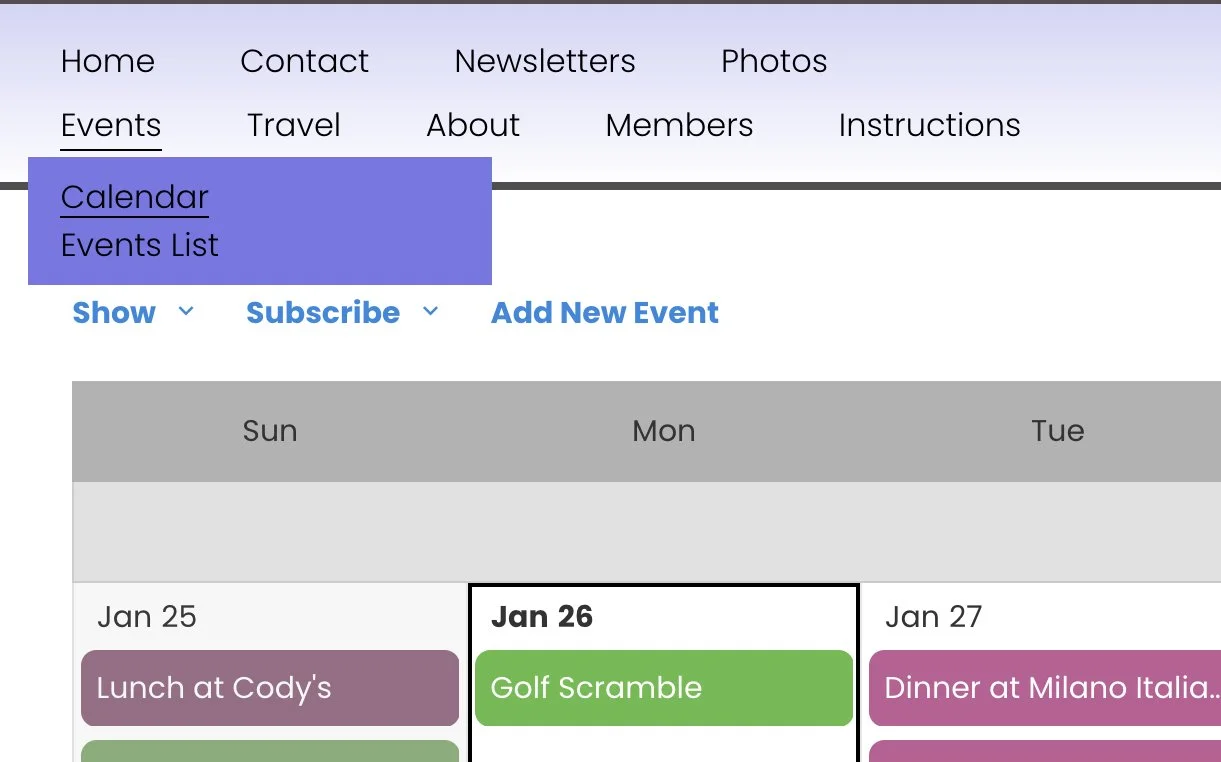
Go to Events>Calendar
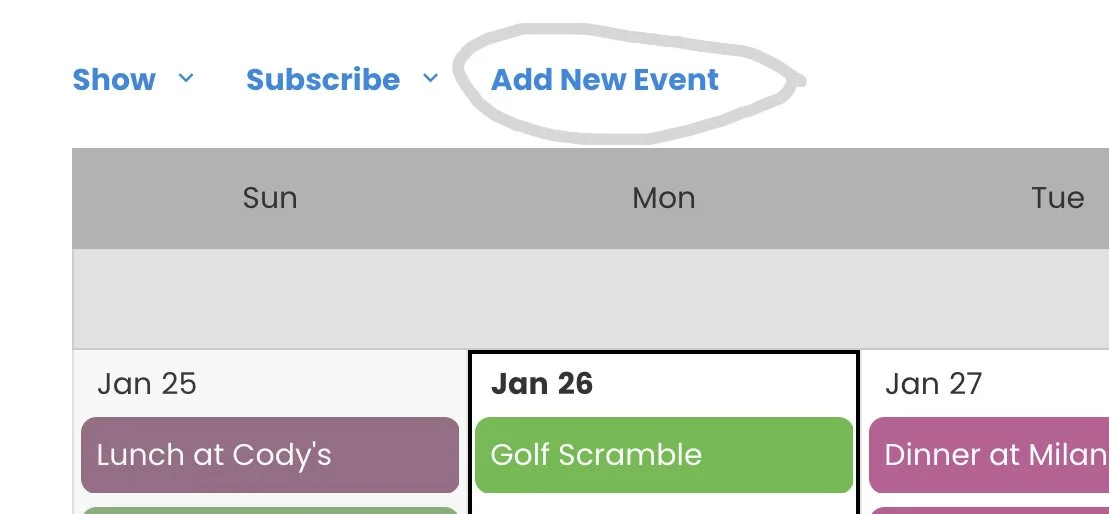
Step Two
From the calendar menu, click “Add New Event”
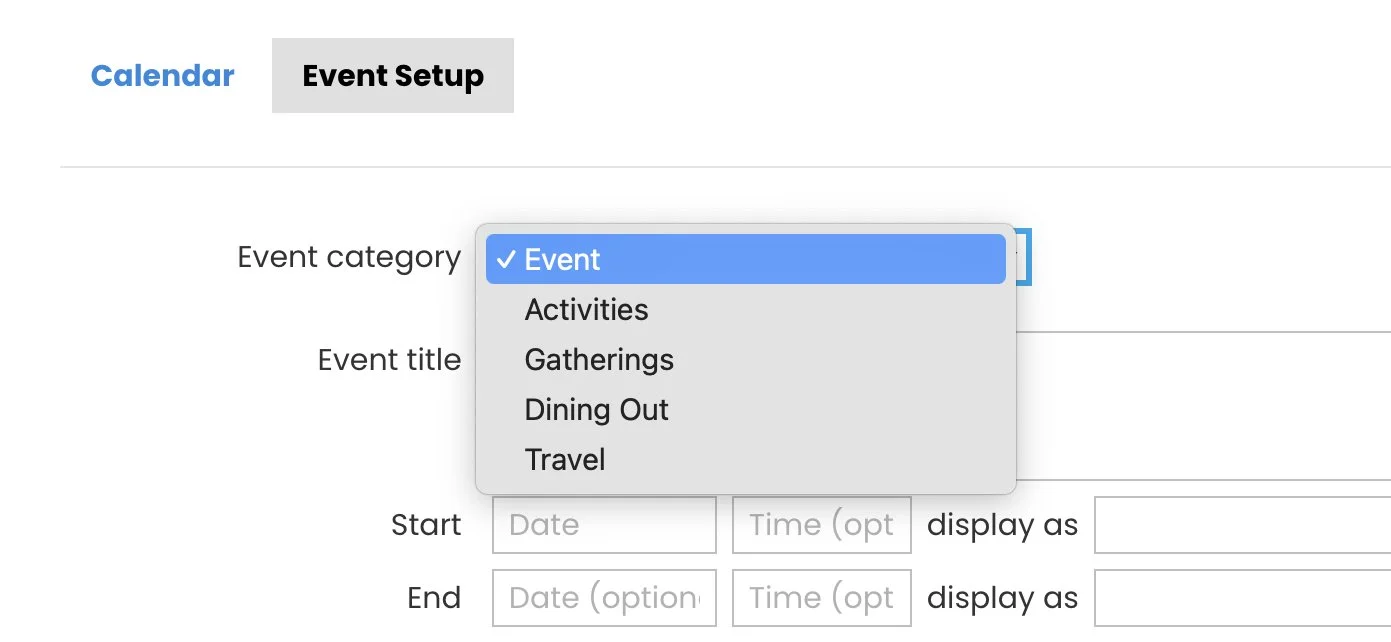
Step 2a - Category
Click the down arrow by Event Category and choose the correct category. If you don’t know which one, choose Activities and our calendar approvers will help you get the correct one during the approval process.
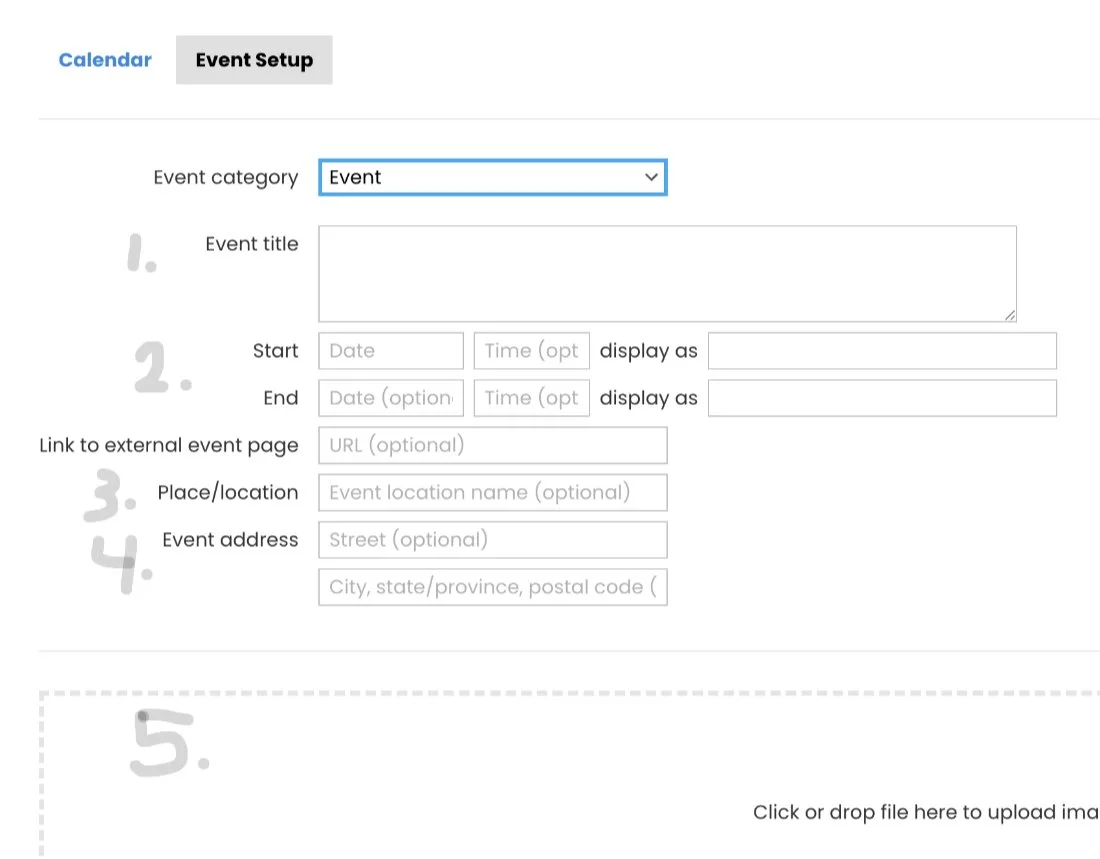
Step Three
Complete the following:
1) Event Title (look at previous event/activity titles on our calendar for examples)
2) Proposed Start and End Date & Time (use the drop down to choose the date/time. Do not type it in)
3) Place/location (Name of Venue)
4) Event Address
5) If you have an image, you can put it here. If not, leave this blank. If you have image resizing software, resize your image to 450 pixels wide.
6) See more instructions on right
Step Four
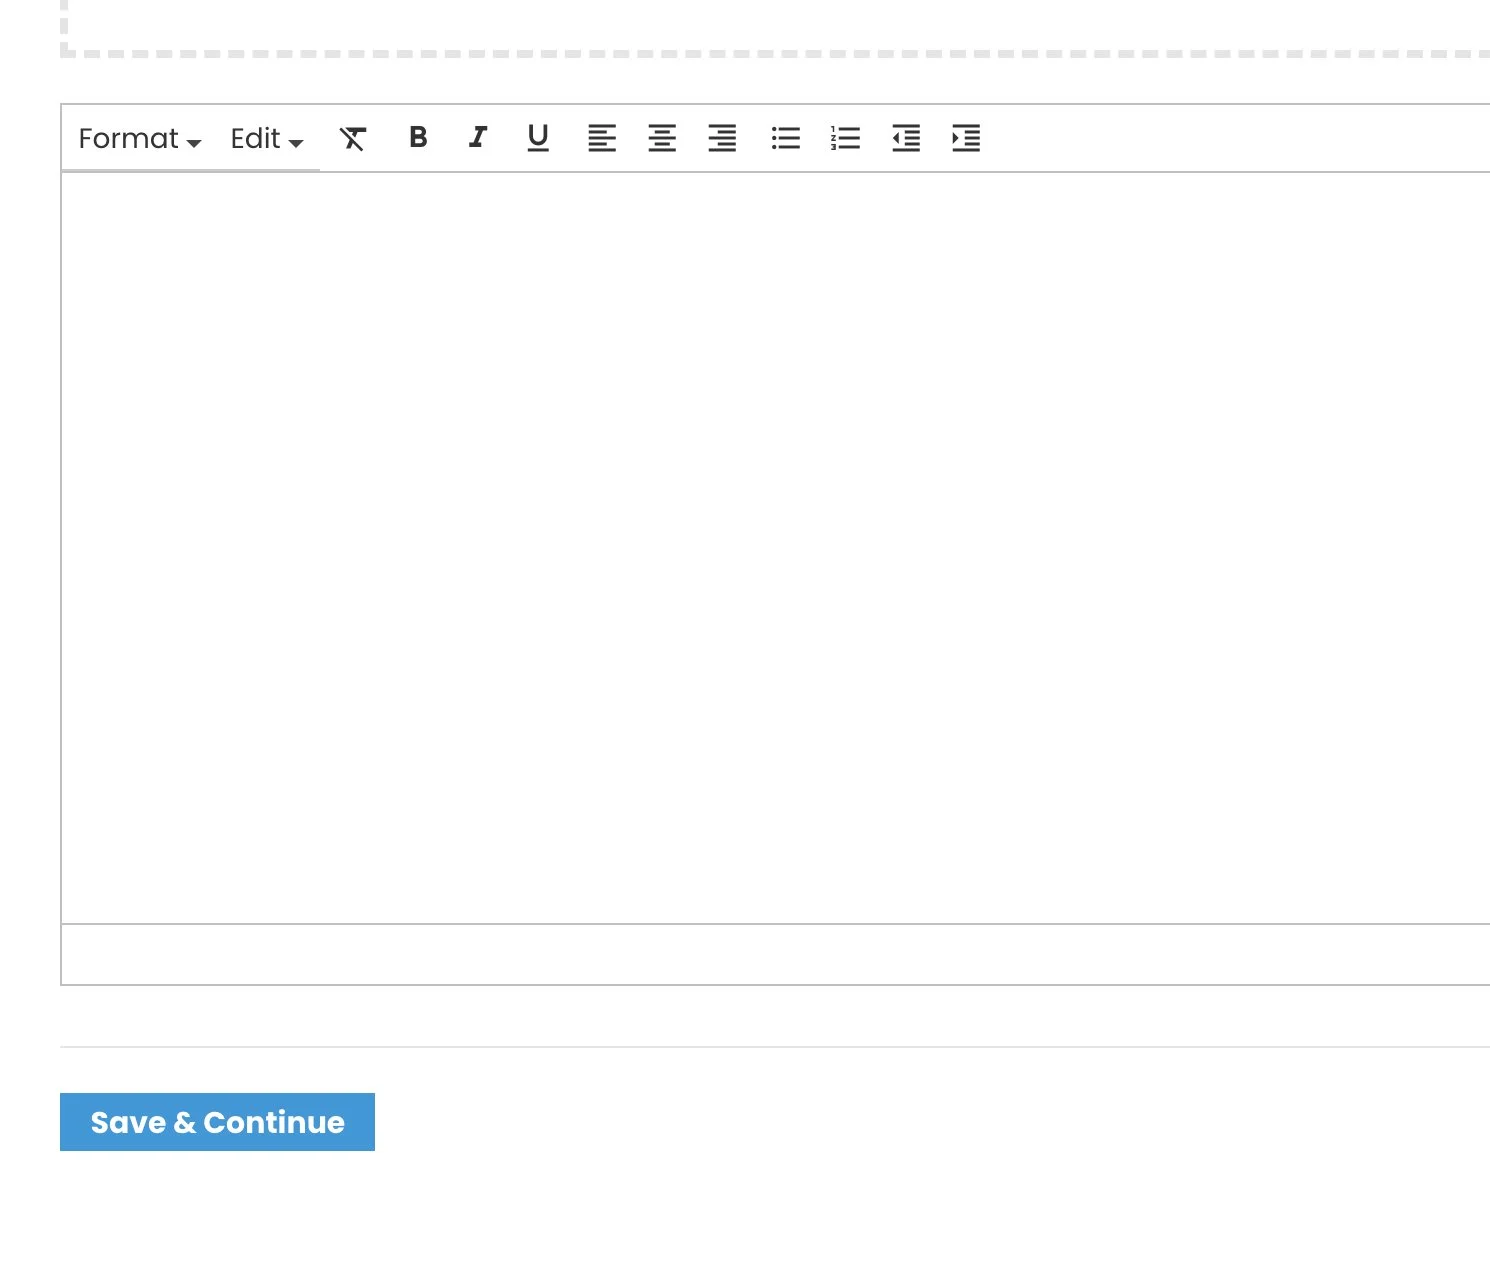
1) Scroll down to this box.
2) Add a written description of your event for our members (do not use business website for description). Remember to review and answer the 6 questions if applicable following your description:
Can we include guests?
What is the cost?
Pay at site or will we collect fees?
Is it Non-refundable?
Are you carpooling?
Closing date for registration?
3) Click “Save & Continue
Important:
if your activity will take place inside of OTOW, you must submit a room request via the OTOW App to reserve a space and complete a contract for that space. We will ask you for this information after you submit your calendar item. If you need a specific room set-up, you need to present the floor plan to the recreation dept at least 3 weeks prior to your activity.
Step Five
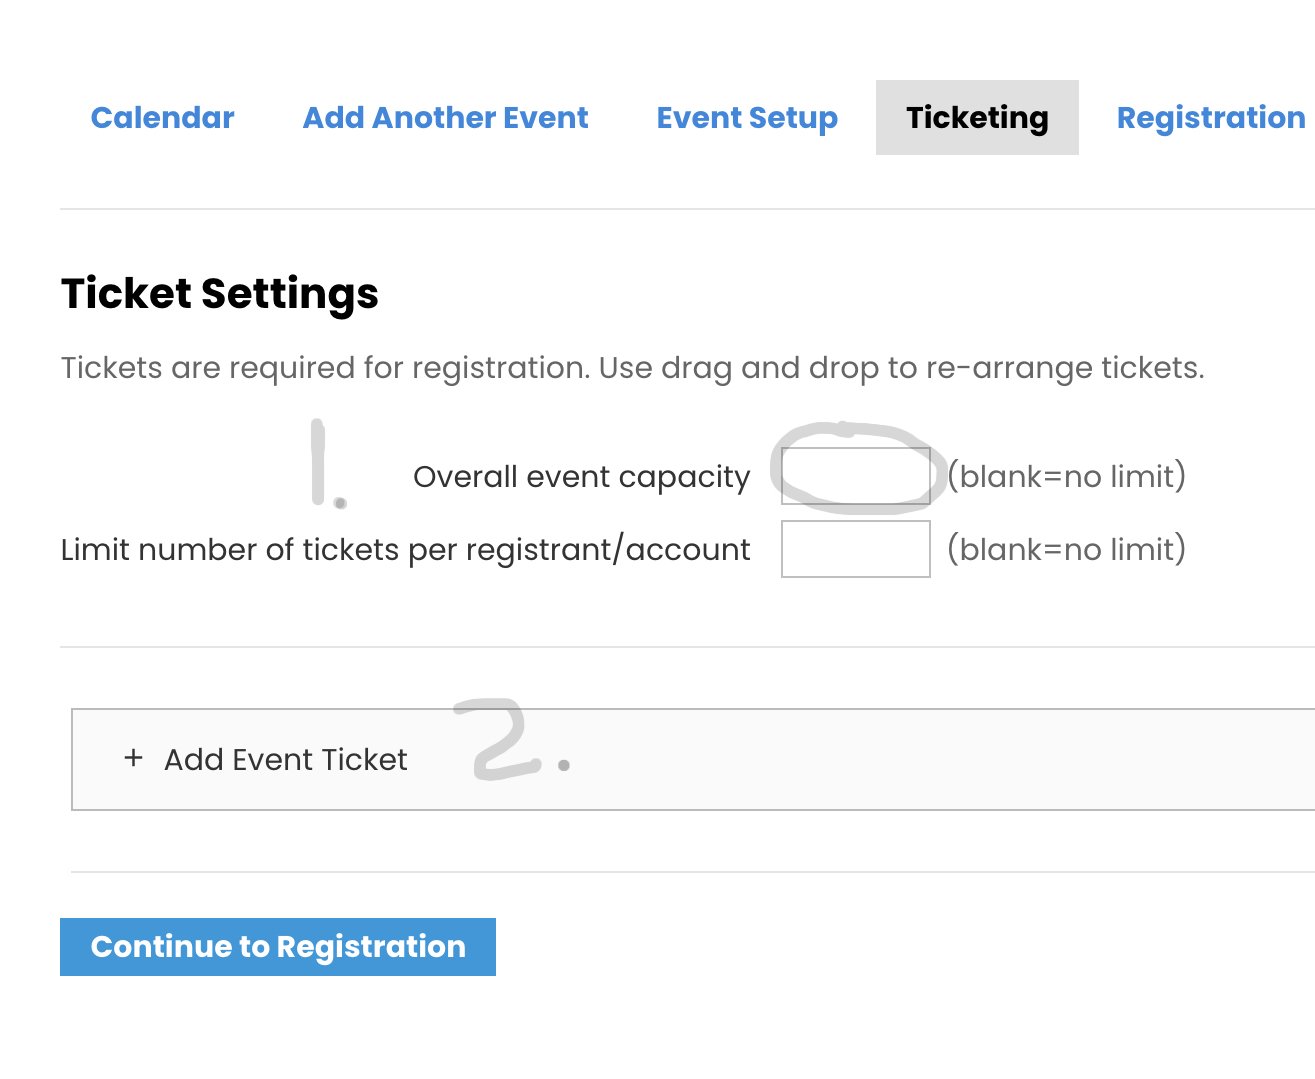
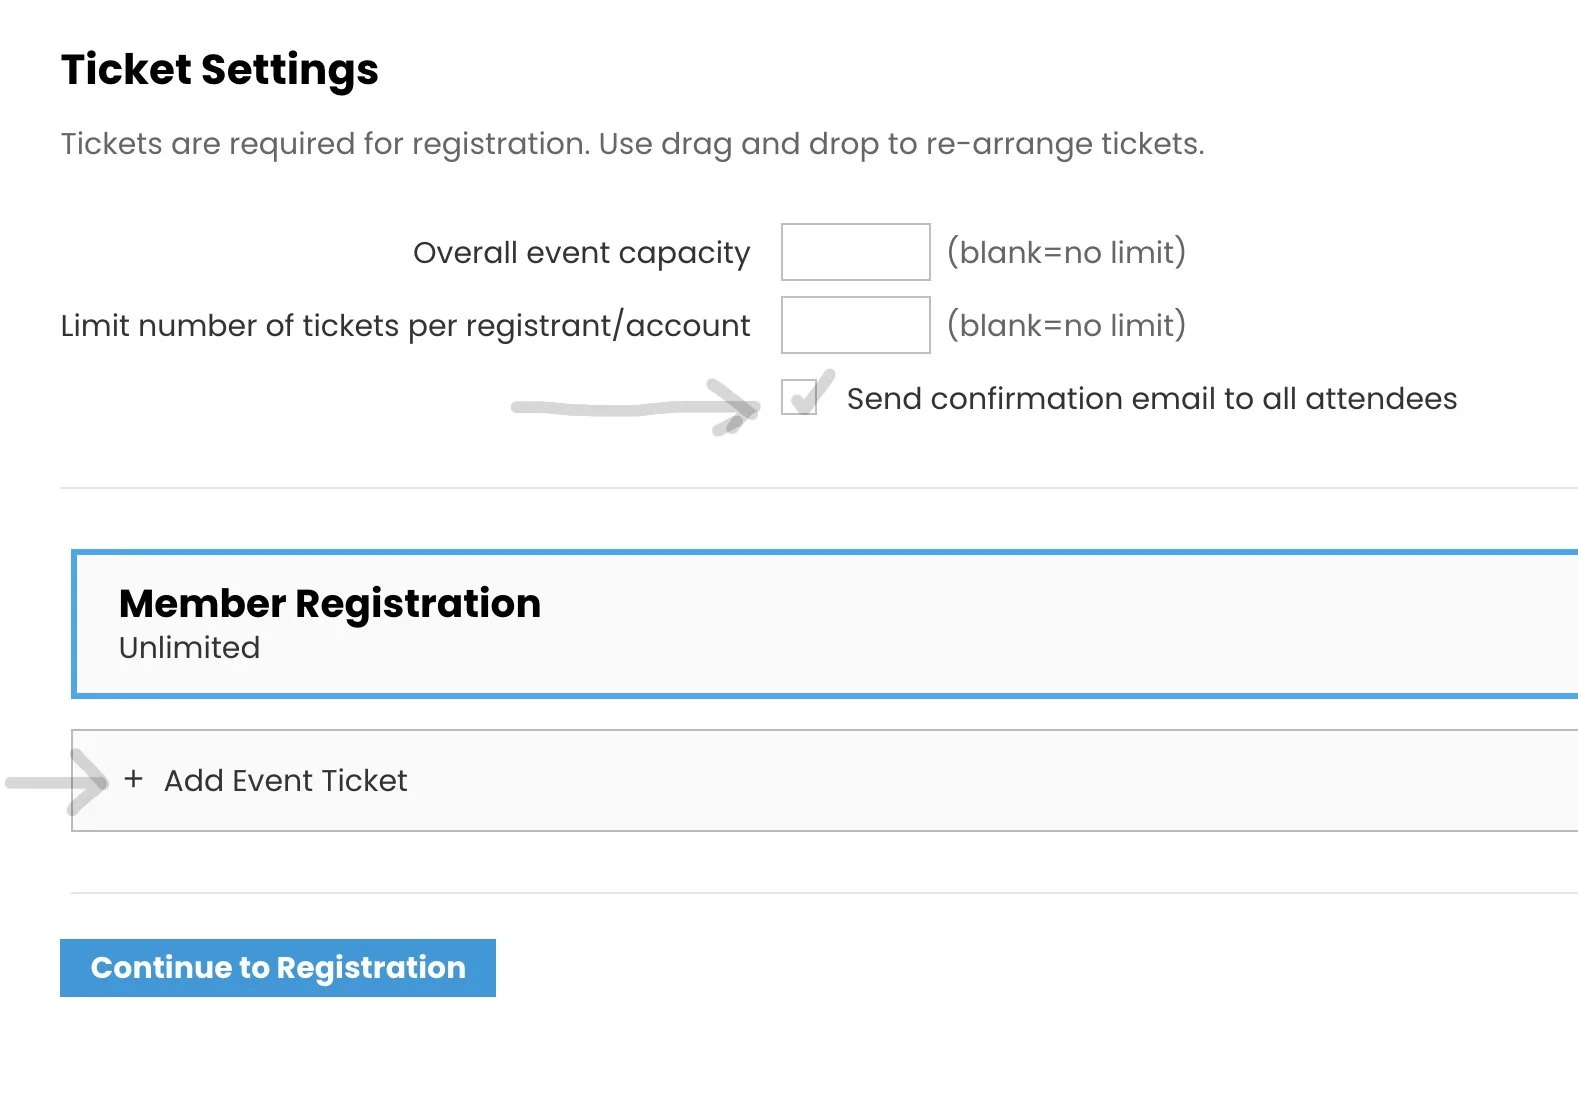
1)Enter the number that can attend in “Overall event capacity”
If any number can go (like Lakeridge Winery), leave this blank
2) Click “Add Event Ticker”
Step Six - Member Registration
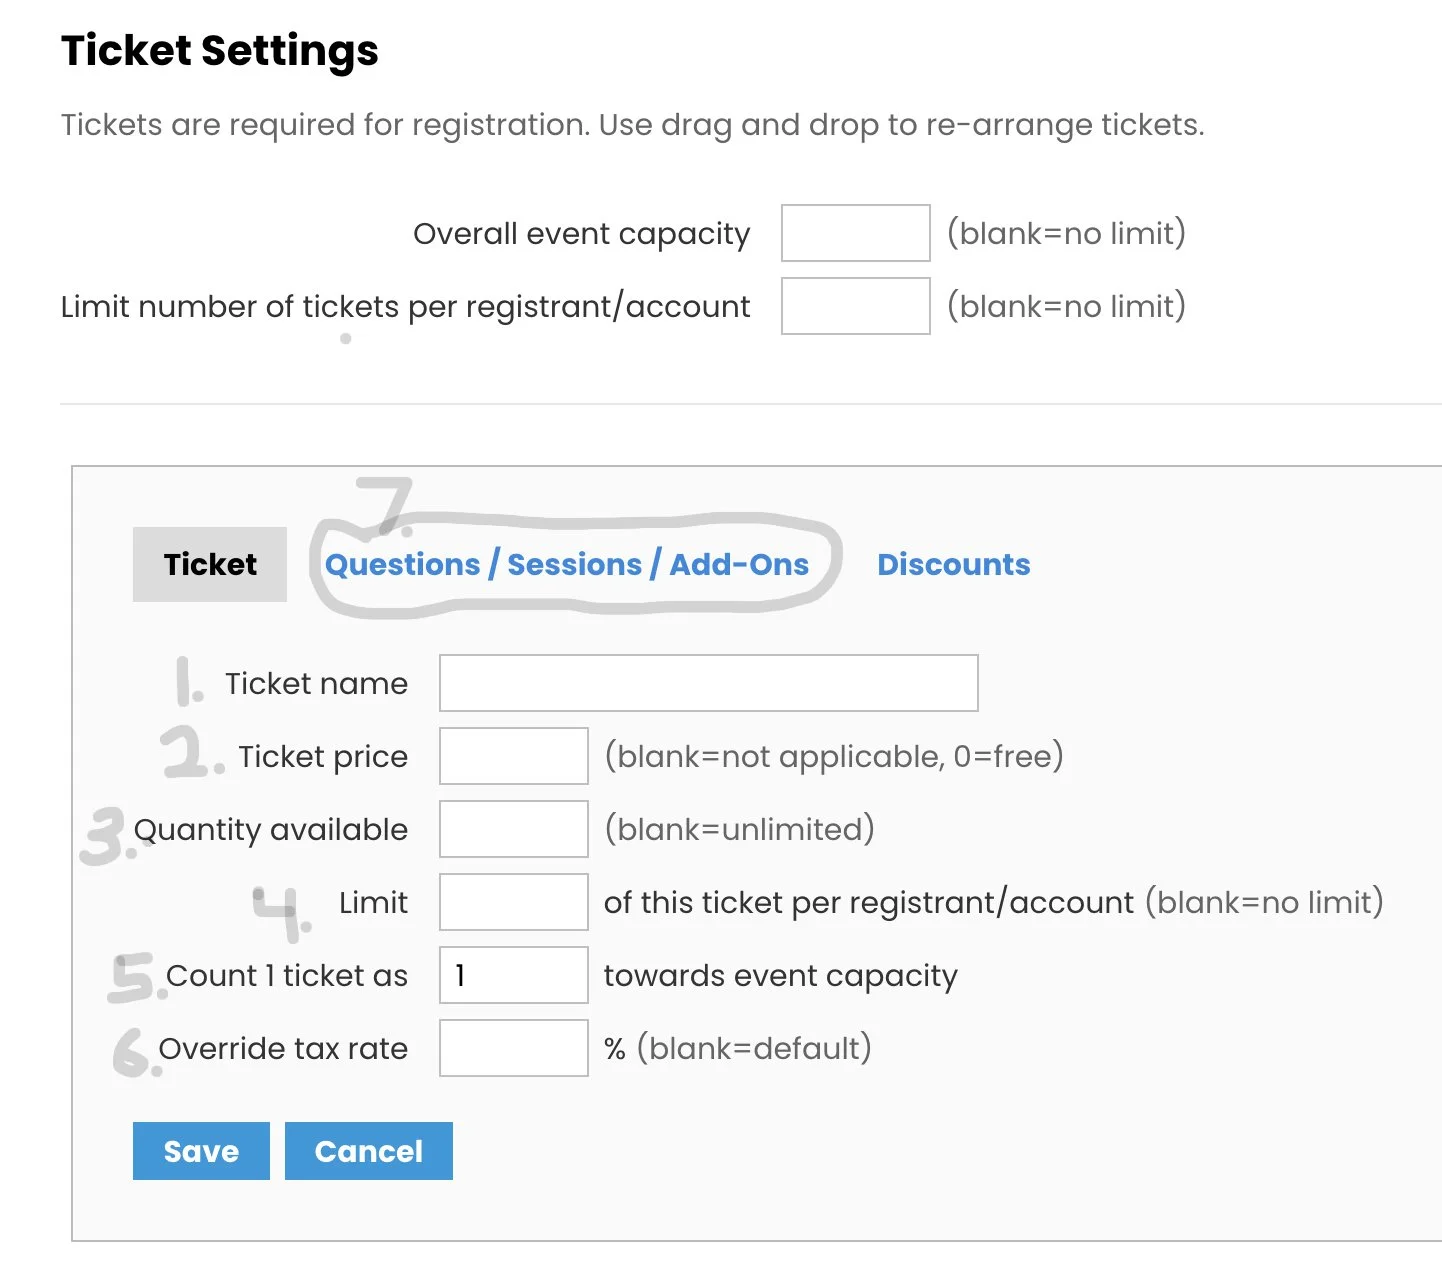
1) Ticket Name: enter “Member Registration”
2) Ticket Price: enter the amount we are to collect; must calculate credit card fees and add vendor processing fees and state/county tax. If no cost, leave blank.
3) Quantity: leave blank
4) Limit: enter “1”
5) Count 1 Ticket as: leave the 1 in there
6) Override tax rate: leave blank
7) Click “Questions/Sessions/Add-Ons in the box above Ticket Name.
Go to next step.
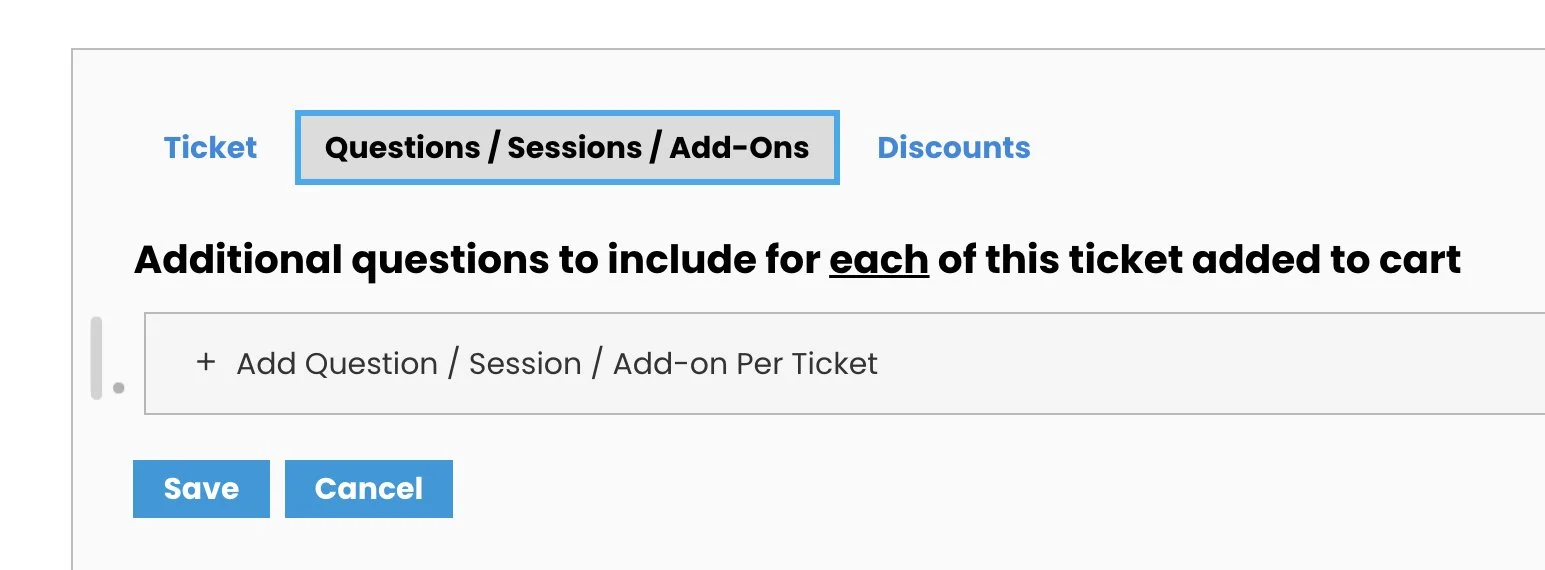
Step Six-A - Questions
1) Click the box “Add Question/ Session/ Add-On per Ticket”
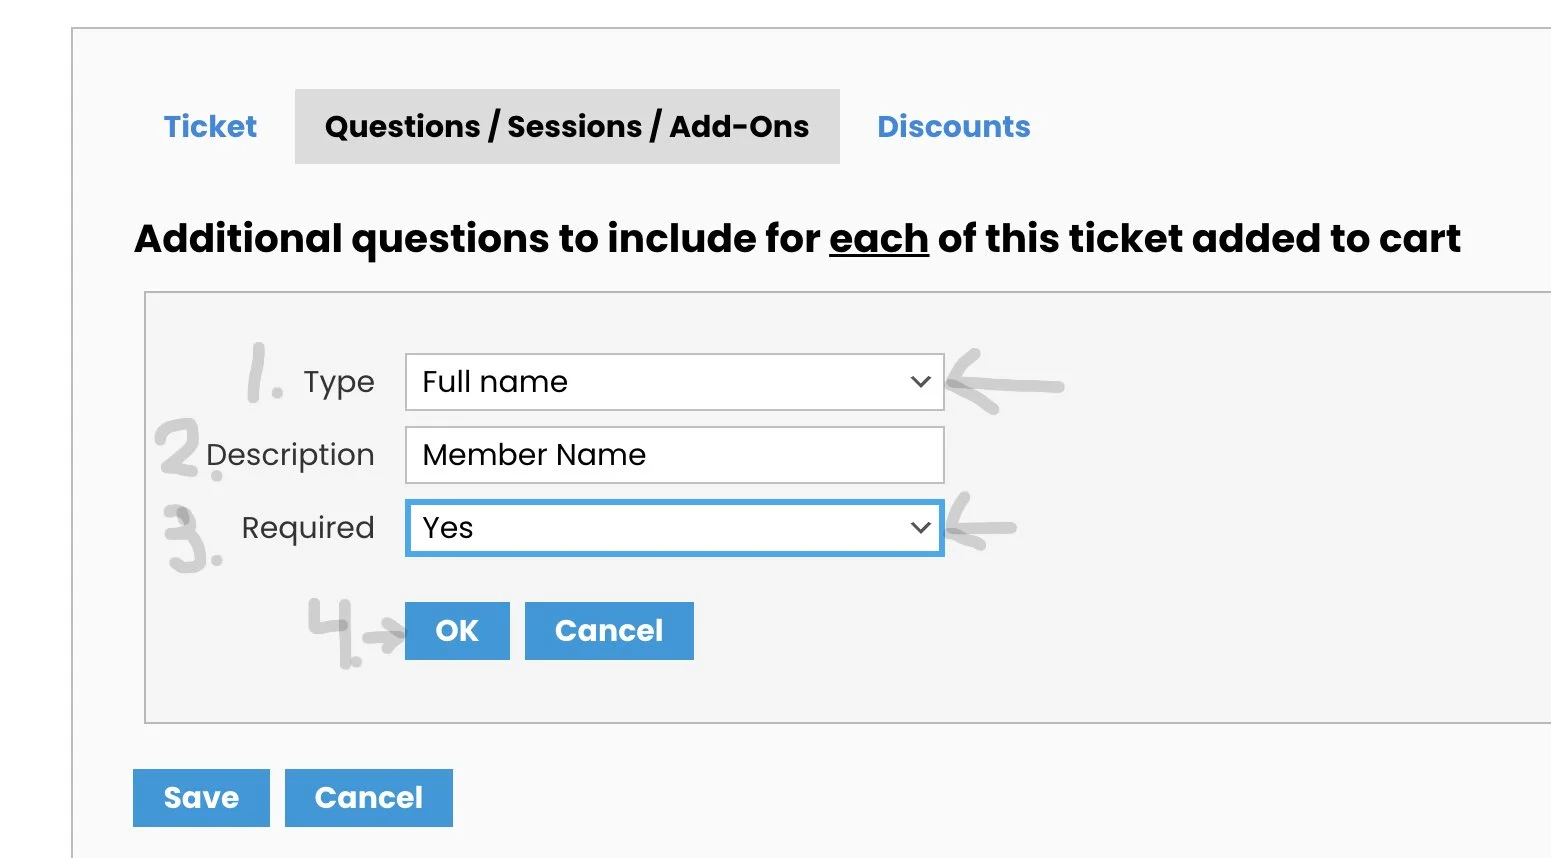
Step Six-B
1) Type: Use the down arrow to change “Custom - Text Input” to “Full Name”
2) Description will prefill with “Full Name”. Change that to “Member Name”
3) Required: Change to Yes
4) Click “OK”
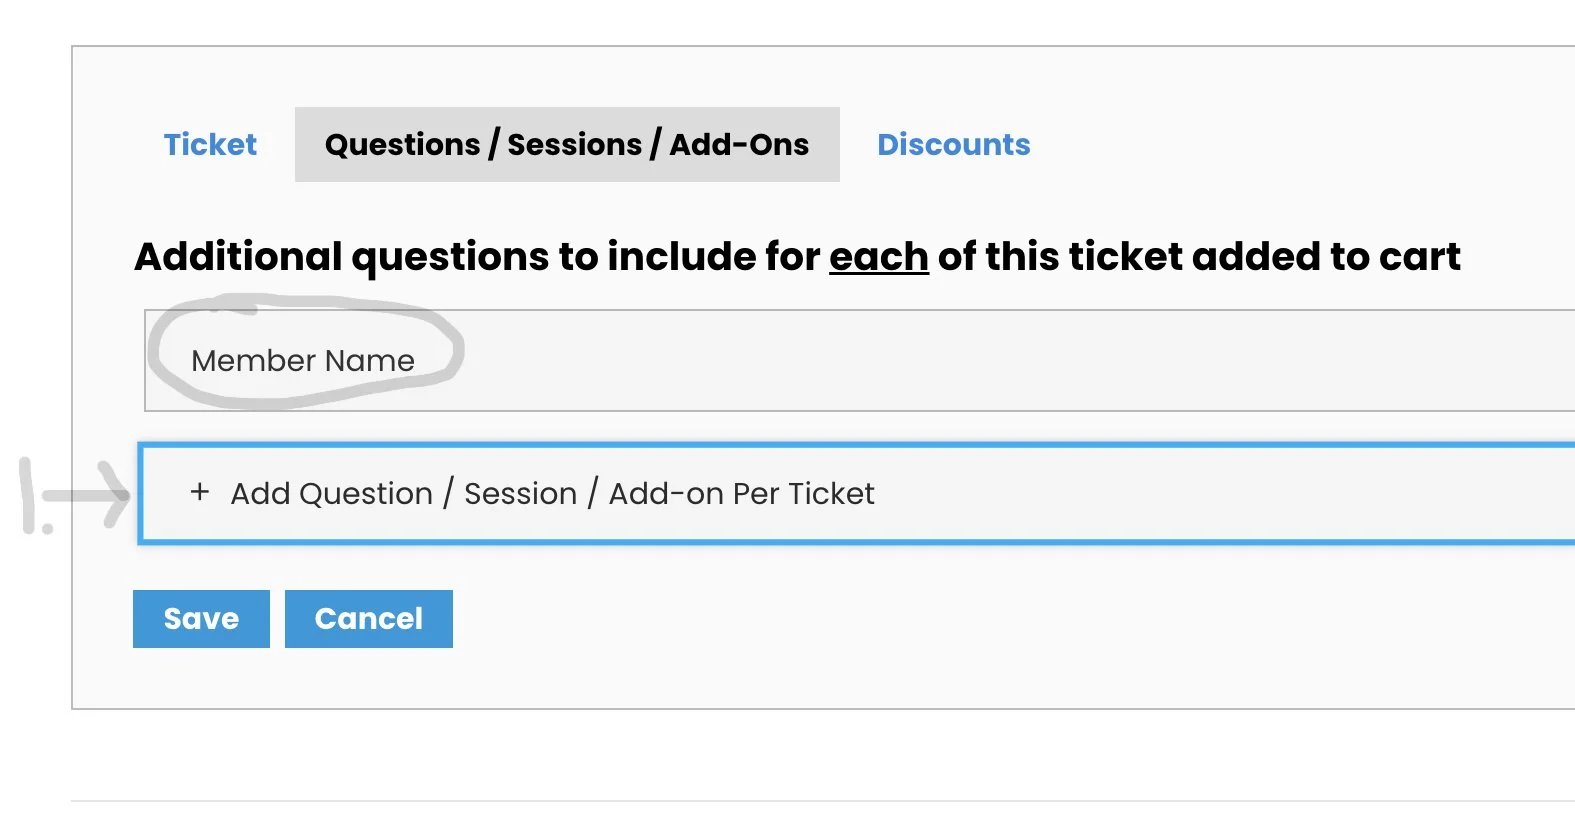
Step Six-C - Another Question
Note: You are still working on the “Member Registration” ticket. Your screen should look like the image on the right.
You should have a box that says “Member Name”.
1) Click + Add Question
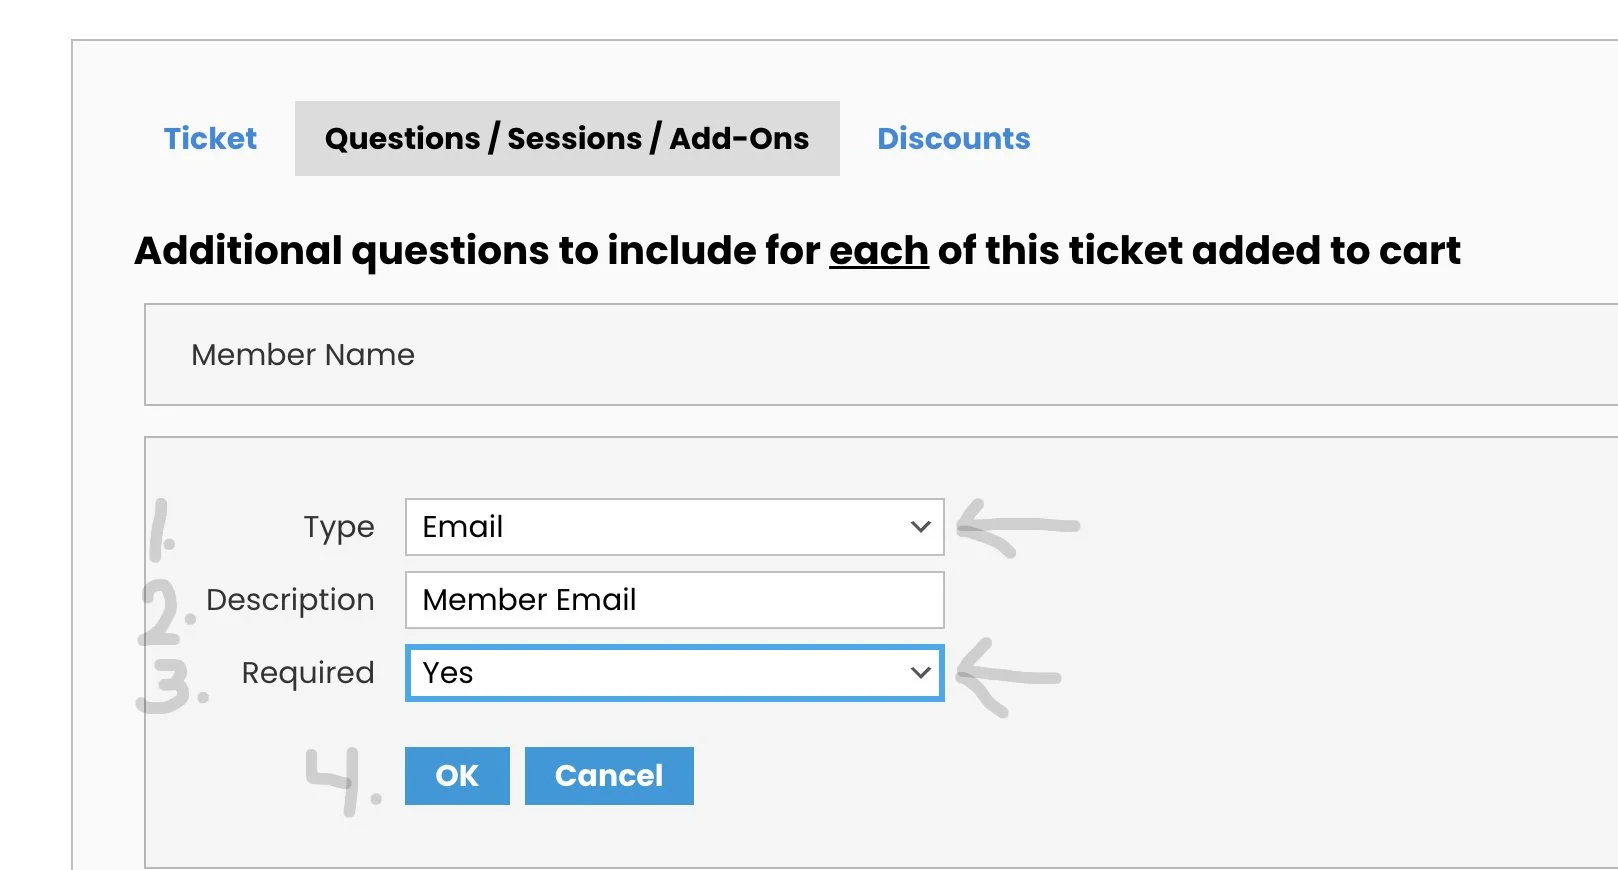
Step Six-D - Another Question
1) Click the down arrow to change “Type” to Email
2) Change the description to read “Member Email”
3) Click the down arrow to make Required “Yes”
4) Click “OK”
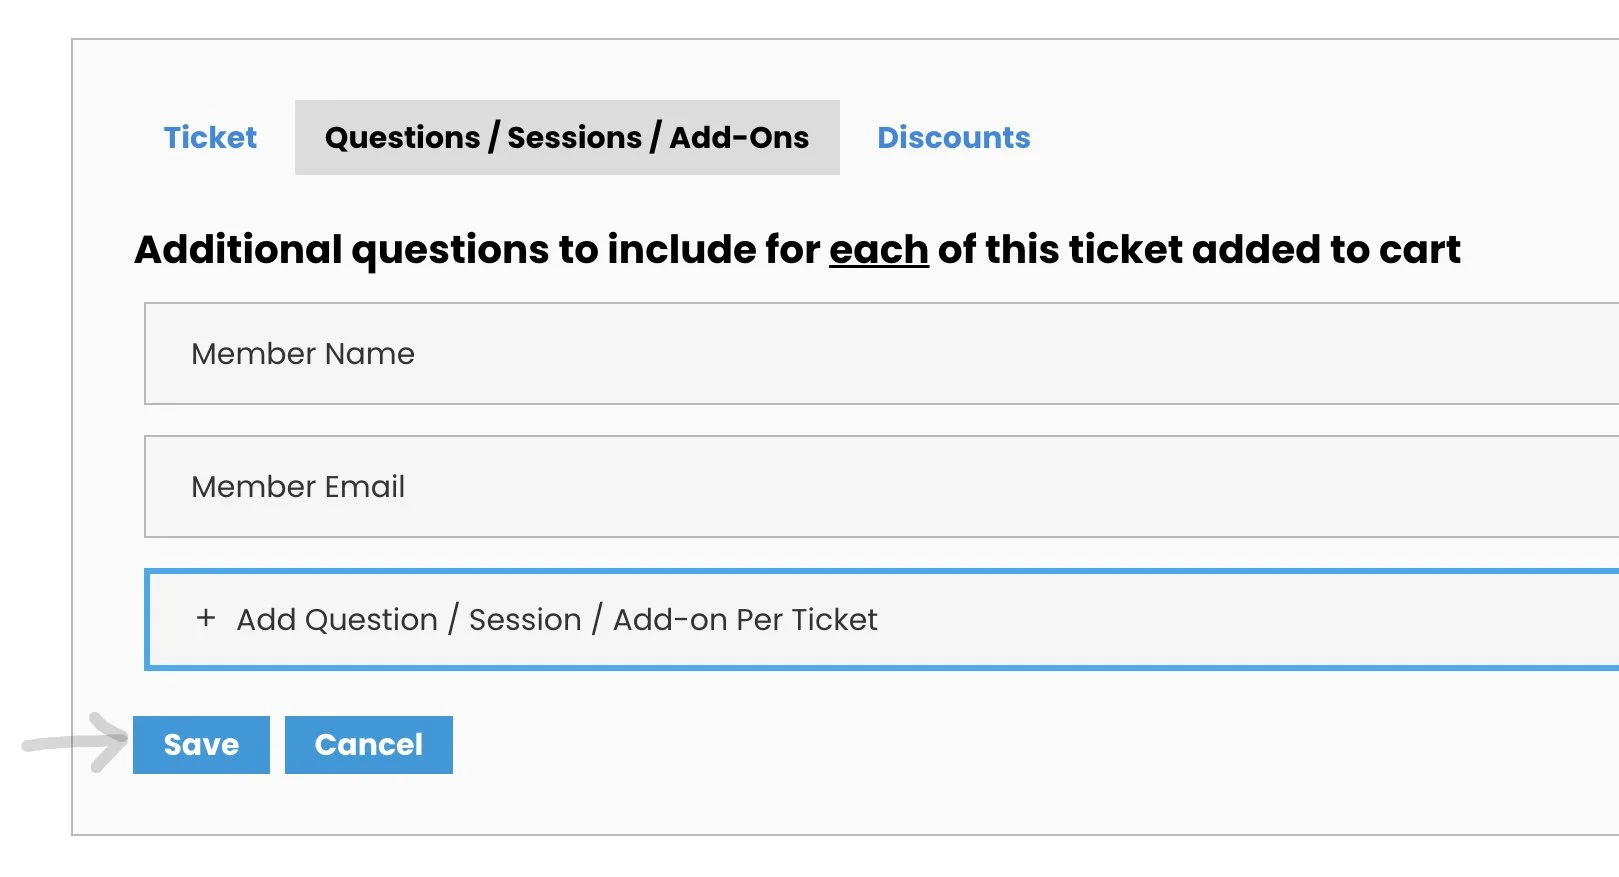
Step Six-E
After you clicked ‘OK” in Step Six-D above, your screen should look like the screen on the right.
Click “Save”
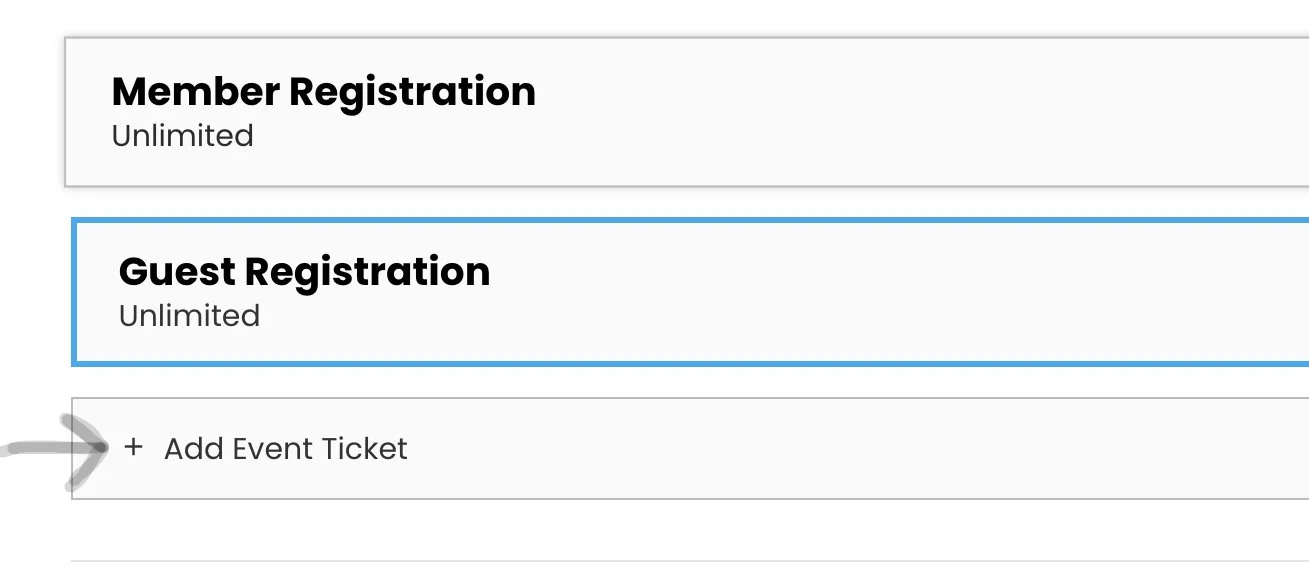
Step Six-F
After you click “Save”, you will be brought back to the Ticket Settings screen.
If guests are allowed, click “Add Event Ticket” and starting at Step 6 - Member Registration follow the above steps to make a “Guest Registration” ticket. Where it says “Member”, change that to Guest in the Ticket Name and in the Full Name box. In some cases, the Guest Cost will be more than the Member Cost.
You need to also follow the steps for “Questions” (name and email) changing “Member” to “Guest”.
Click the box under “Ticket Settings” that says “Send confirmation email to all attendees”
When done, if you are planning on carpooling, you need to make a ticket for that. Directions below.
Step Six-G - Carpooling
If you are planning on carpooling, you. need to make a ticket for that.
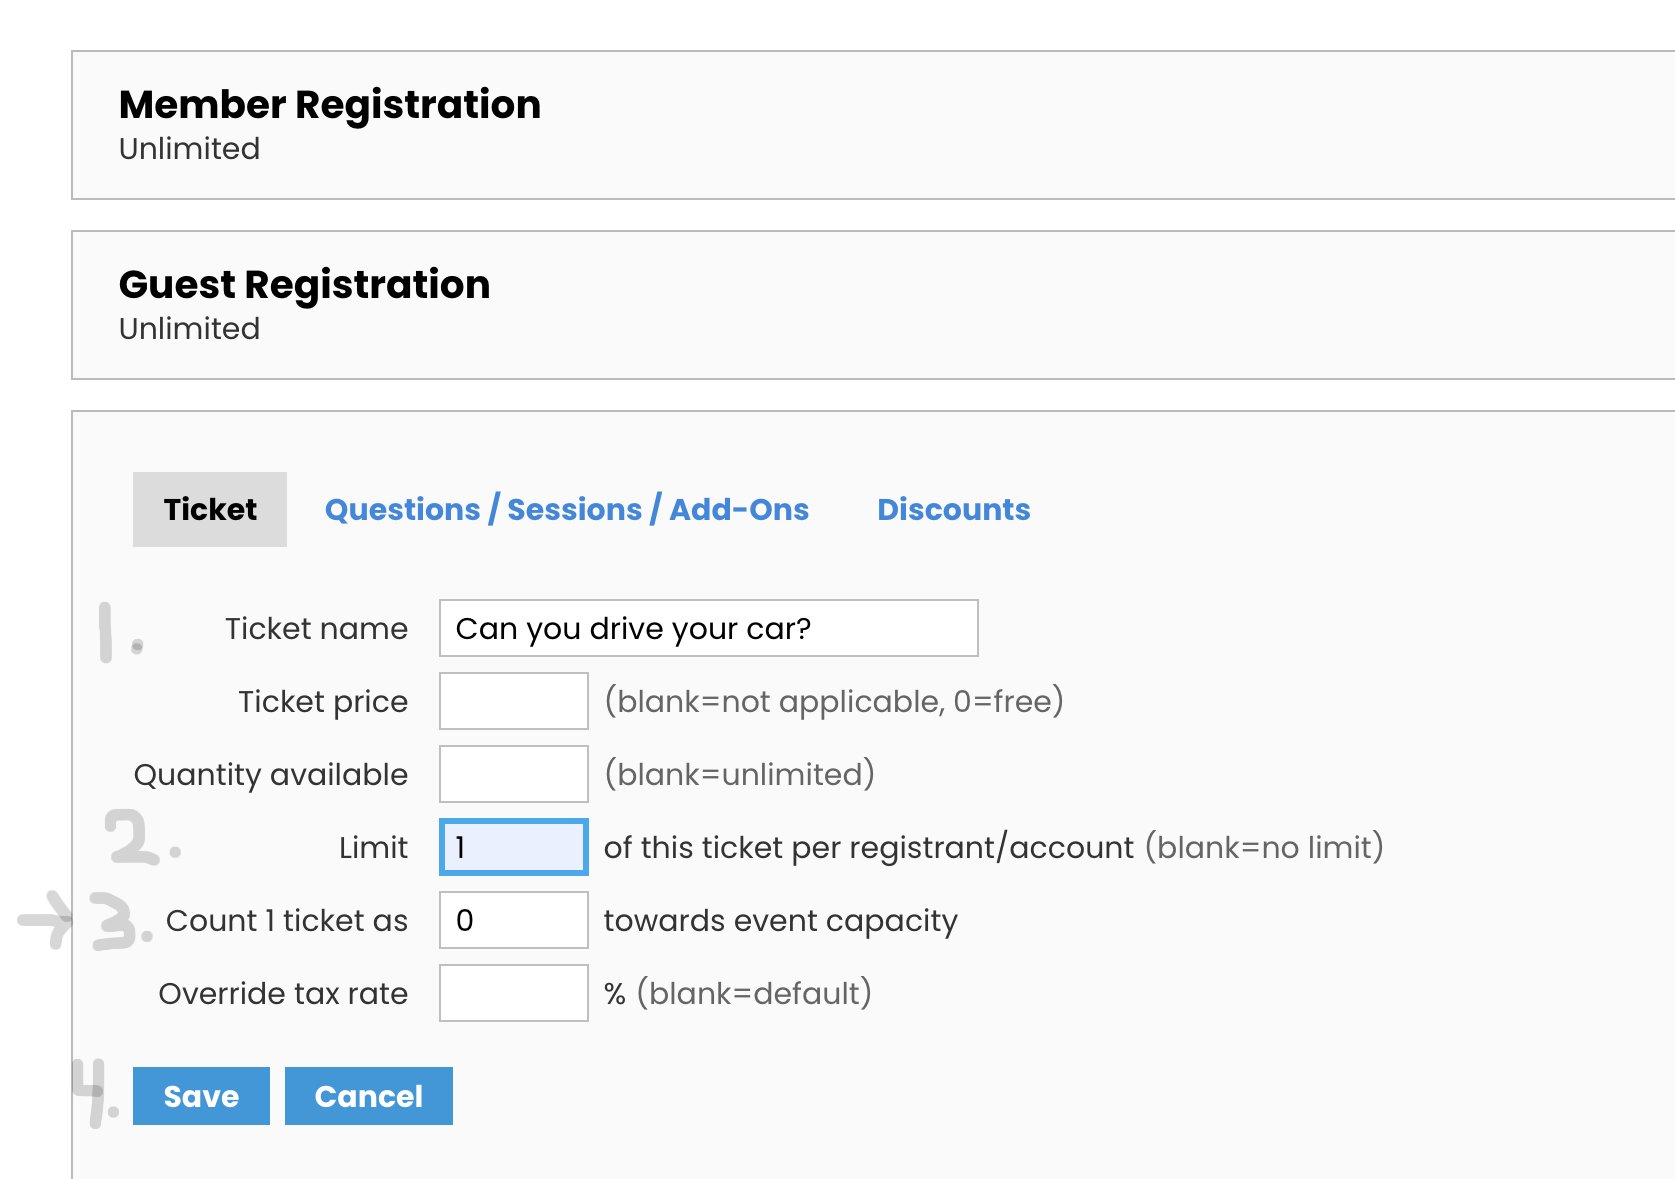
Step Six-H - Carpooling
1) Ticket Name: Can you drive your car?
2) Limit = 1
3) Count (important) change to “0”
4) Click “Save”
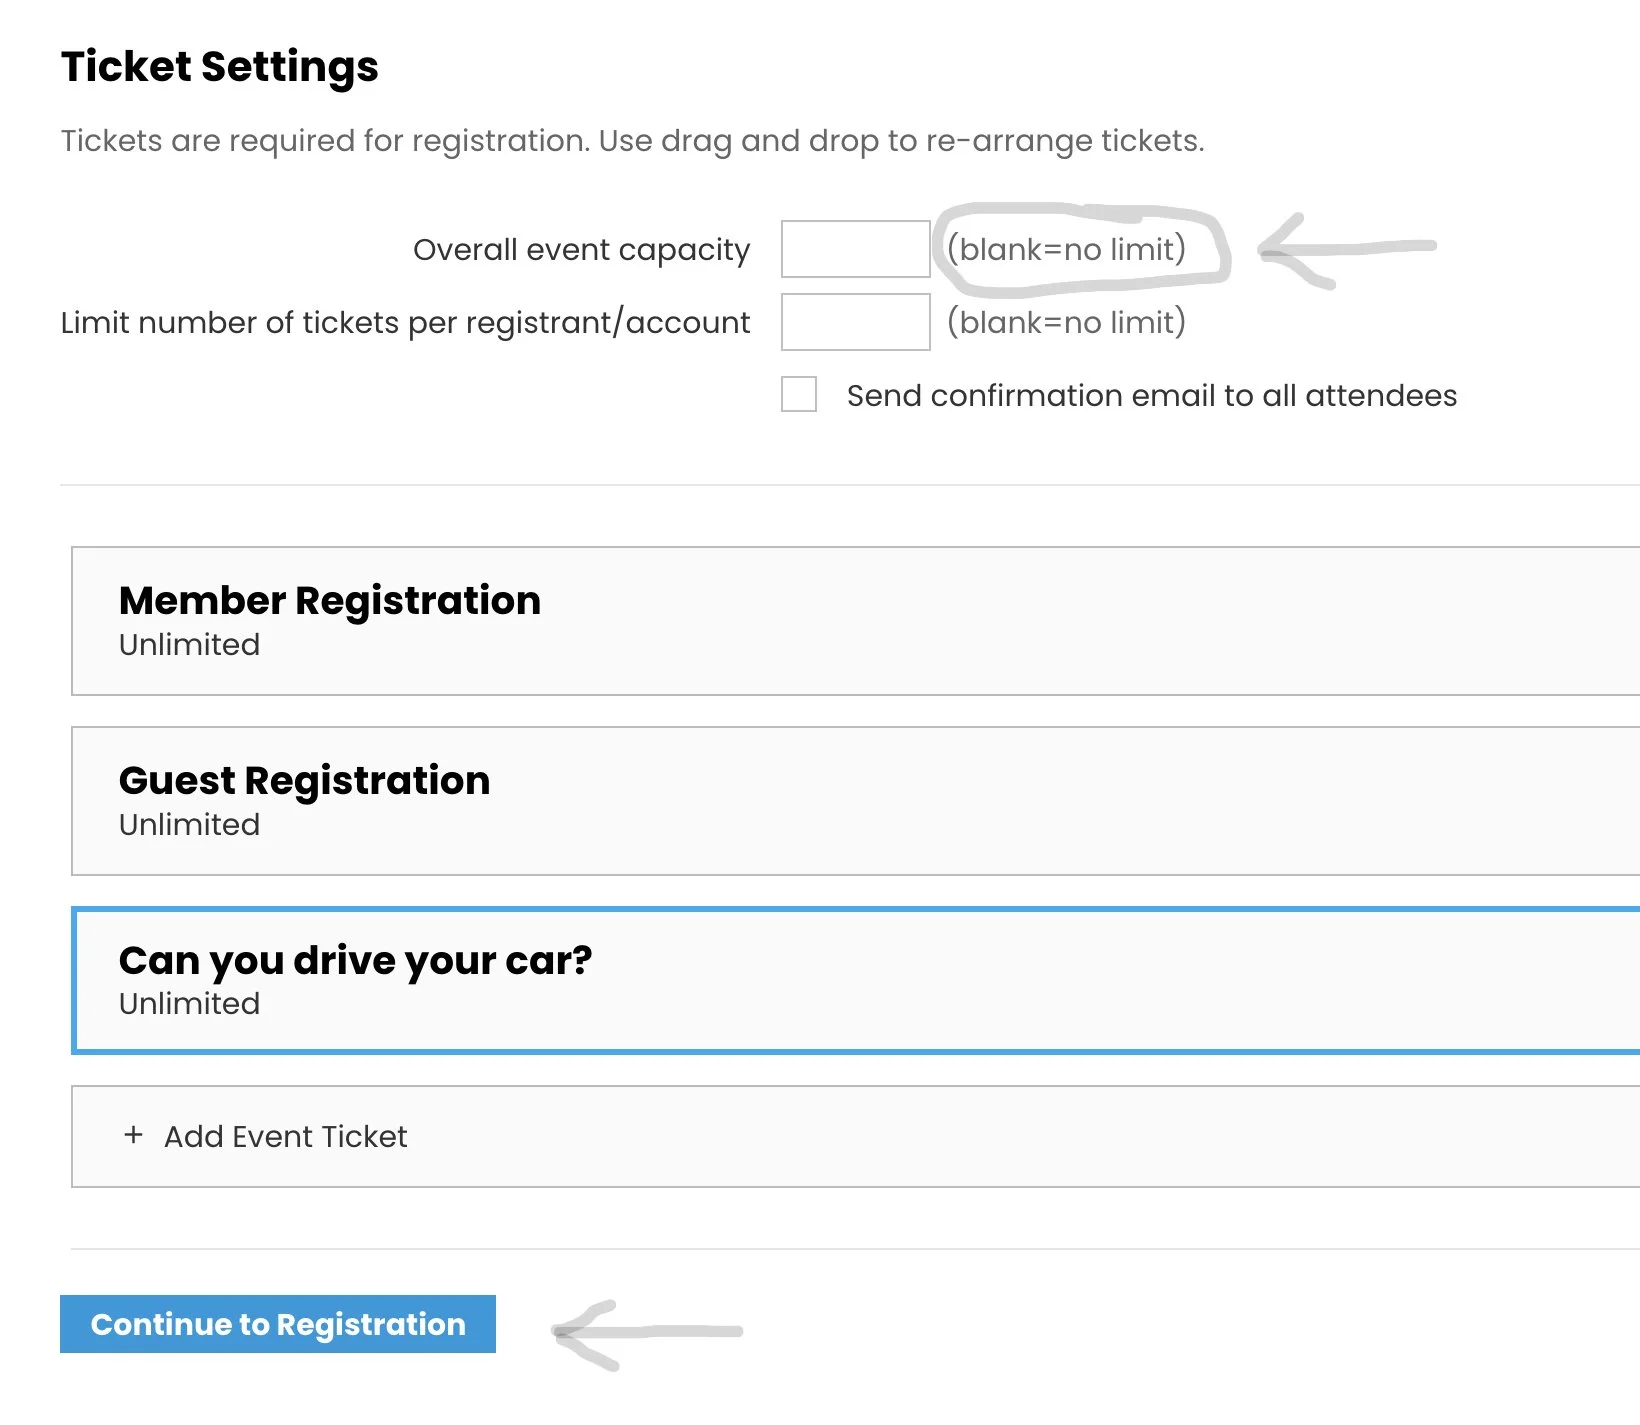
After you click “Save” above, you will be brought back to the Ticket Settings screen. If you want Members & Guests, and you need people to drive cars, your screen should look like this screen on the right. If it does not, you need to go back and see what steps you missed and try again. When your Tickets are what you want, click “Continue to Registration” and follow the steps below.
Overall event capacity will have a number in there if you entered one when you started the ticketing process.
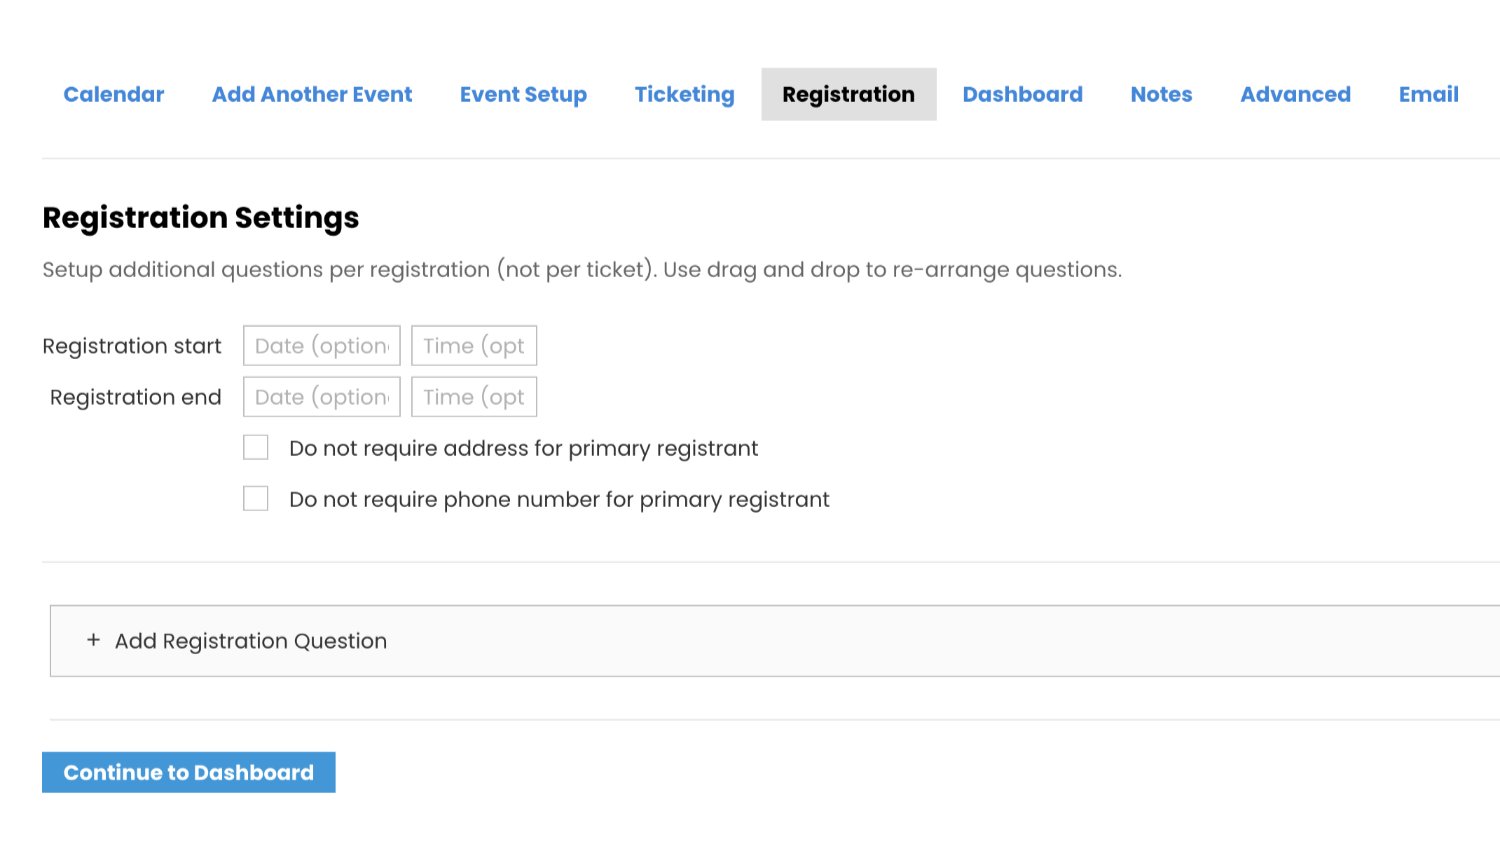
Step Seven - Registration Settings
This is where you set the date/time that members can start registering for your event. It is also the place where you set the date/time when they must stop registering.
Click your cursor in the date box and use the drop down calendar to choose the date. Do the same for the time .. there is a pop-up clock with times every 15 minutes for 24 hours. Use the pop-ups - Do not type the date/time in these boxes.
If you want members to start registering the same day you put this on the calendar, leave start blank. If they can register right up to 5 minutes before your event, leave end blank.
If you put a number limit when you made your tickets, registration will end when that number is reached. It will show “Sold Out”.
Click the box next to Do not require address. If you want phone numbers when you export your list, leave the phone box blank. If you do not need phone numbers, click this box.
YOU ARE DONE!
Thank you for entering your activity on our calendar. This has been submitted to our calendar administrators for approval. You cannot see your activity on the calendar until it has been approved. The administrator responsible for approving your type of submission will notify you when your entry has been approved.
For the calendar approvers: Using membershipworks, follow these steps to insure that all items have been correctly completed. If so, complete your steps for approving a calendar submission. When done, go to the “Event Setup” page and change the entry from “Hidden” to the proper event category. Scroll down and click “Save”. Check the website and make sure everything looks ok. Thanks for helping!!